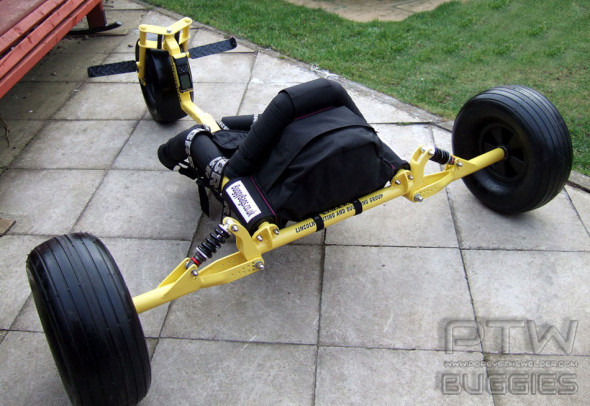
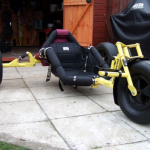
The PTW ’06 Fandango Buggy
The Making Of The Fandango 06 Kite Buggy
“I wanted to make myself a buggy, I had bought a second hand PLxr buggy with kenda scorpions on and thought it was fantastic. I then started to take more notice of other buggys and could then see ways of which I could improve what I had. I made the decision to sell the PLbuggy without the wheels as I wanted those babies. I have limited materials and equipment at work and have to work with what I have got.”
“I trawled the internet and collected every single buggy picture I could find that caught my eye, my idea was to take the parts I like off of these other buggys and try to improve on then in some way if at all possible.
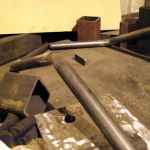
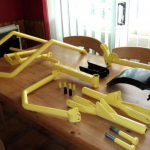
I tried bending the 33mm side rails but wasn’t happy with the slight kinking on the inside of the bends, so reluctantly I used ready made elbows, and welded the straight cut lengths to them , at least that way I could make sure the angles were exactly what I wanted.
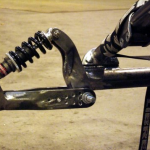
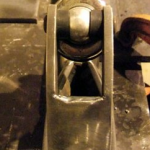
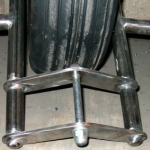
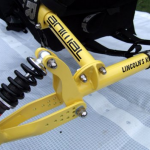
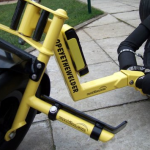
Originally I had straight 27mm tube for foot pegs coming off these forks with a round plate on the end, but then decided I wanted something better than that, and made two cheque plate foot plates, on the back of the foot plates a welded two pieces of 33mm tube to slide over the foot pegs, I had already made a slot in each foot peg to take a 8mm bolt that way the foot plates would turn on the round pegs about 20 degrees.
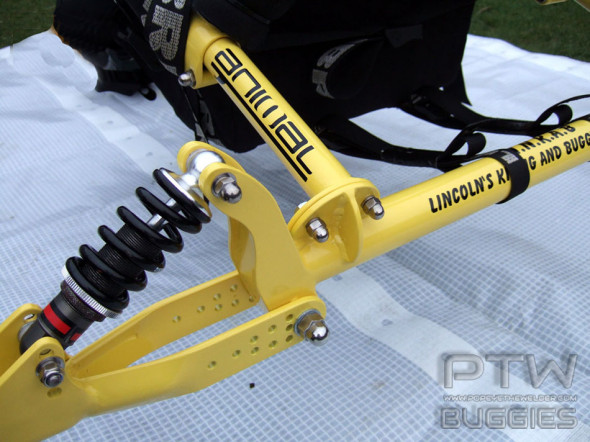
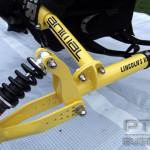
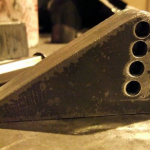
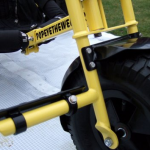
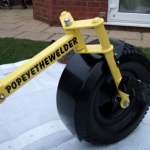
I stated work on the forks making the fork tubes from 27mm steel tube, I wanted the top and bottom plates angled as I had seen pics of those and liked them.
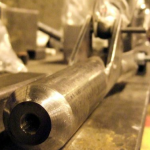
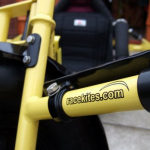
The main tube on the axle is 42mm, and I could go on and on about all the little lugs & bits that I had to fab to get the desired effect.
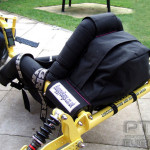
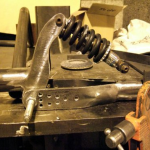
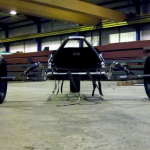
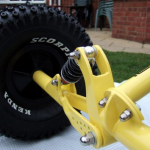
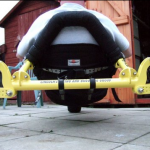
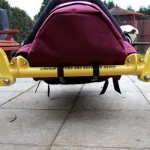
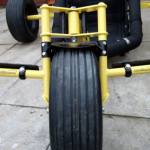
The axle, obviously took the longest to make, and first I had to find some quality shocks, I found some Ballistic shocks that are about £70 each new.
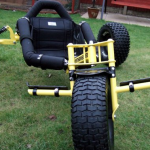
I looked at the PL suspension set up and didn’t like the straighness of the shock housing, so after making templates and trials I ended up with the housing angled towards the wheels.
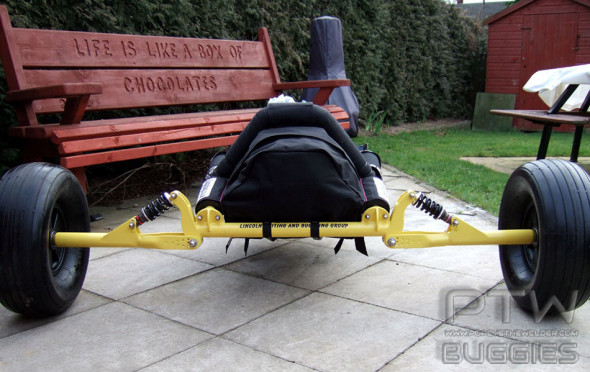
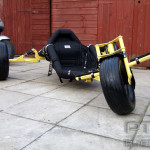
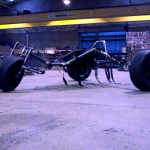
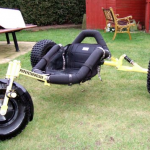
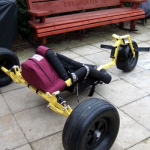
Lastly, the axle and wheels I am very pleased with.
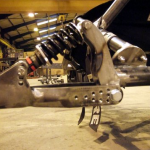
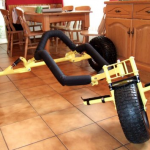
The end result, and in fact, it is the back end that to me, that makes this buggy a good one.
The axle is about 1800mm long overall, I only have to take the bottom 12mm bolts out of the housing and the extra axle parts with the wheels on will fold virtually to any position, swinging on the shock.
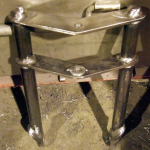
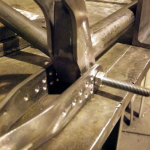
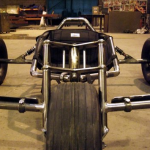
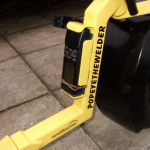
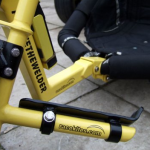
The original downtune is 40mm box and I think what is unique about this buggy is the way I have joined the side rails together.
Made from a piece of 50mm box with the bottom cut out basically, I then added lugs at the bottom to attach the down tube.
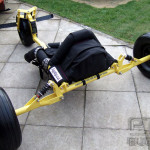
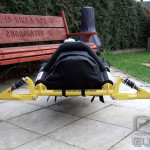
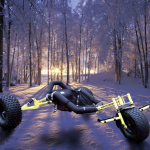
I want this buggy to be able to fold down quite small, so after taking the front bolt out the whole front end swings under the seat. I have now made a swan neck and cant wait to try that out , it lowers the buggy by about 80-110mm and looks a lot more steamlined.
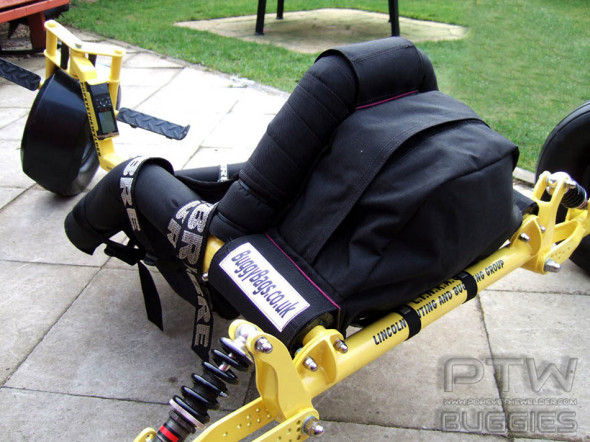
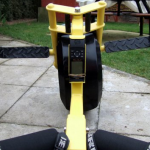
The first run was really good, although it was for only half an hour due to bad weather, it is like sitting in an armchair soooooooo comfy, the seat is slighty tilted back, which I think is a nice position to fly a kite in, the swan neck will make it into more of a speed machine, for which I am lookin forward to trying out”.
Techincal Specs:
Dimensions
Forks 27mm tube with 6mm plates at either side of the headstock, 12mm front axle.
Swan neck now added pictures to follow shortly
Side rails 33mm
Rear axle 42mm
Back rest 32mm
Foot pegs 27mm, with 4.5mm durbar foot plates
Weight
Axle=14lb 6.35kg
Siderails=11lb 5kg
Downtube=6lb 2.72kg
Backrest=3.5lb 1.58kg
Mudguard and Foot plates=2.5lb 1.13kg
Total Buggy wieght=92lb 41.73kg with wheels and eveything on.
Build time although a lot of this time was developement work about 30 hrs.
-
- 06 Fandago Buggy
Fandango Buggy Comments
1/ Best looking home brew I have ever seen. So how much you sellin em for??
Scoop
2/ I want one, does it come in red?
3/ Greets, Popeye-the-Welder!
4/ That’s an awesome piece of craftsmanship you got there, nice work!
5/ I, too, would like one… make mine blue. Oh, and don’t let Peter Lynn get too close a look at that rear axle.
6/ Man! That thing looks great! I’d buy one too.
7/ I was just teasin’ on the Peter Lynn reference, but now that you said it, it DOES look like a vast improvement on the rough build of the PL suspension axle. Will it fit a PL comp? Do you offer that axle as a stand-alone purchase? Interested, here…
8/ Very nice work, we all like to see that someone is not afraid to takle that kind of project, more pics please, and let us know how it handles……..
9/ Don’t mind Lack-O-Slack, what ever color buggy he rides …… he always attracts unwanted attention
10/ HEY POPEYE LIKE ALL FORUMS AGREE YOUR BUGGY ROCKS.WHAT PARTS HAVE YOU USED AND WHERE FROM;SHOCKS,SEAT,WHEELS…LINKS PLEASE.ALSO YOU SAY IT IS TO COSTLY TO SEND IT TO US HOW MUCH YOU THINK IT WOULD COST OR WHAT IS TOTAL BUGGY WEIGHT.AND FINALY WOULD YOU SHARE BUILDING PLANS IF YOU HAVE ONE- DIMENTIONS AND MATERIALS SPEC.HOW MUCH DID YOU SPEND ON MATERIALS?I ASK LOT OF QUESTIONS?MAYBE I CAN BUILD FEW OF THEM HERE IN USA SINCE YOU DON’T WANT TO SEND ONE THANKS
11/ That is truely stunning work! Very very nice.
12/ It’s been my aspiration to build my own buggy from scratch since I first got started. Not quite there yet, still acquiring the necessary tools and techniques, but getting close. I’m hopeful I’ll get started this summer. I have managed to make my own heavy duty extended axle for my PL comp. My 6′ 5″, 280 lb. are a bit too much for the standard axle, I have to flip it over about every other time I ride it to bend it back the other way!
13/ I’d love to see more pictures. I really like the high back rest pipe, and the joint with the side-rails/down tube looks interesting. I hope to make the neck joint on mine quick-release so that I can take the front wheel off and through it in my truck without tools! And what where the shocks originally from? It’s one of the missing pieces I still have.
14/ This is definitely a benchmark for success! Nicely done.
-Chip maker of neat things.
15/ You do some nice looking fabricating there.. looks like you may have a ironworker for some of the bends and such. Really professional looking buggy. I am in the planning stages for a homebrew buggy as well. I dont think there are many people into this from New Brunswick, Canada
16/ Very nice work. Super design details and bits.
17/ looks like you may be ready to get into the buggy bussiness
18/ You should see what he has made for me! Trouble is i have not had time to make the seats yet.
Great Bloke, ever so helpful and a dam brilliant Welder.
Will post pics when it is complete.
Ps It is Definitely unique!!!
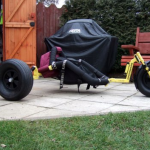
19/ wow, that is a great looking buggy, you really spend the time on the looks, What a machine !!! And I would like to scream out Oncour , that trailer you have looks great, that is what you call workmanship !!! By the sounds of it you have a back order already hahahah Steve
20/ Absolutely the best home-built I have seen. Congratz. Im very interested in hearing how it handles..
Scoop
21/ Dude, that is one bad-ass looking buggy. Please build one for me immediately! How is it working out so far?
22/ b e a u t i f u l ! Hope you have many happy times in it!
23/ I’m no buggy freak, but that’s a very fine looking peice of work.
24/ Top marks!
25/ Absolutely stunning!
26/ Are the bottoms of the rear suspension pressings or welded up plate and tube?
27/ Sorry but I can’t help thinking it should have pedals on it
Nice piece of workmanship though.
28/ Top quality work – Steel or aluminium?
29/ Very nice indeed. I hope you don’t mind but I have cross-posted it to another forum not far from here where there are a load of buggy freaks who will be very interested in it!
30/ Bloody nice my man, wish I could have one – opps, I’m on Doctors orders not to buggy due to bad back!! shame.
31/ Will you be at Flexi-Wallop by any chance? It would be nice to see it up close.
Mark
32/ I like the foot plates i could do with some of them for my libre
33/ Very nice mate, build it yourself I take it? Likes like a beast, but possibly a bit too high for my taste, does the suspension allow it to sit a fair bit lower when you’re in it?
34/ Finished Bug.. looks great
35/ That’s a beautiful piece of work
36/ That bug is awesome. Nice Job!!!!
37/ dont buggy but that looks SWEET! and thats a practise nice one dude.
38/ dude thats a beast of a buggy! nice work!!
39/ Looks very nice indeed.
40/ I take it the rear sus is fully adjustable ?
41/ That looks the business now Popeye!
42/ I cant believe this thing is not a production buggy, it definately should be mass produced. its looking really nice popey, like the GPS holder.
43/ Looks excellent Popeye . I particularly like your solution to the fork ends. The swanny has transformed it though into a prowler look.
44/ Did you use drawings? Or did you design it in the hand?
Jerry
45/ That is one hell of a buggy, dare’nt ask how much it cost to build.
46/ I can forsee a long waiting list for your double decker buggy trailor popeyethewelder – your talents are endless
47/ Wow that is pretty cool. You need to paint it yellow to go with the buggy.
48/ Top dollar mate… looks well smart.
49/ well done
50/ yes that look good, a well made buggy, looking at the pic of it ,would like to see it sometime
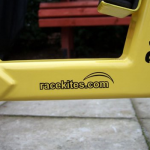
51/ That is a sweet buggy mate, like your name on the downtube, i’m gonna have mine done like that i think
52/ A work of art m8.
53/ really nice job mate.
54/ Sweet buggy, looks like it packs down a treat. Great idea.
55/ That looks very professional!!
56/ Top stuff!
57/ oh yeah Bling Bling
58/ Looks awesome, nicely built, nicely finished.
59/ I do however happen to have one question, I’m curious what led you to put a turf tire on the front and the scorpions on the rear? was it thought out for a reason, or just what happened to be around at the time?
real nice work….looks very very nice…. well done on a top job fella!! and i really like the way it packs down
60/ One question? Can you tell me why you decided not to go with a “swan neck” as without one the seat is high off the ground and kinda tillted up in the air at an angle?
61/ Sweet buggy dude! Looks amazing got to give it to u ,that is by far the best home made buggy ive ever seen. welcome to the yello buggy club dude.
62/ Top buggy Dude, and welcome to the “suspension” club……………
63/ A lot of the weight will come from the Scorpians as they are 4 ply tyres but to give you an idea myfull suspension beast comes in at 45kg with bigfoots all round
64/ The dogs dangleys
65/ real nice buggy, looks ace fella
66/ That really looks the biz. I’ll keep my fingers crossed for some good winds for ya.
67/ Is that your other toy in the shed
68/ bug looks awsome fella cool the way it packs down. I want one ;@)
69/ nice bit of engineering there mate, seems a dam shame to get it dirty.
70/ still wont tempt me away from my flexi though mate
71/ top job
72/ Very nice looking bug mate.
73/ top buggy would love to see it in the flesh im realy tempted with suspension on mine sweatest bug ive seen
And to top a stunning looking buggy…. the guy can take constructive critisim.. Top job ,,top bloke
74/ some nice welding there mate how much do you charge
75/ Very nice.
76/ May I ask where you got the suspension and wheels from?
Again, very nice
Ziggi
77/ Don’t let spikey Jack near it !!! he’ll have it copied and made within two days LOL.Wouldn’t it be better with slicks rather than treads ? Nice to feel it moving around
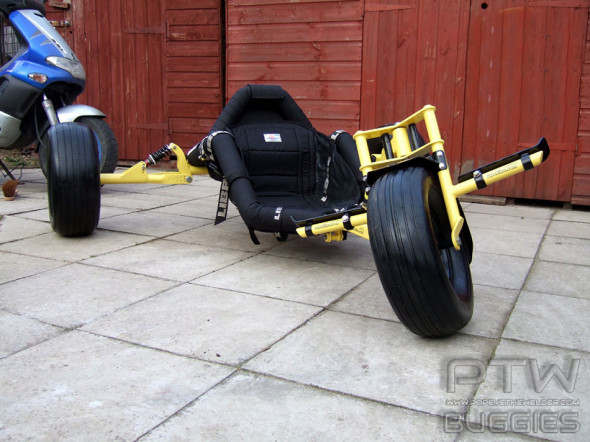
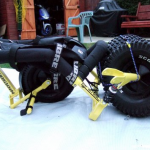
78/ the rear tyre’s are Kenda Scorpions, (on standard rims) they are VERY grippy, i was using them at wallop this year, good for cutting the grass and you can get them to slide on dry hard grass. the front is a “normal” turf tyre.
by the way your sat in the buggy, i’d recomend making a swannie and trying it, definatly worth trying it avs
79/ That is awsome dude would you have to consider coppyright for something that looks that good judging by the feedback you could be on to something
80/ With the swanny and weight it has, the improved angles should make it a great little cruiser!!
81/ Now, if that is your first fandango, I would hate to see the MKIV!!
82/ Bad To The Bone!!!! hey popeye can you send me one to test ………..
83/ Hi Carl, If you are able to it’s best to keep the swan neck section that attaches to the buggy side rails parallel with the ground like the xx racer as this does not change the geometry of the buggy when using it long or short.
84/ yeah that looks the job, and as you say the seat rails look much more level to the ground
85/ it may now need lower foot pegs as your feet may be up in the air a little, its hard to tell from the pics, you will soon see when you go out next testing
86/ glad you got it out at the weekend and got it cranking it does look sweet
87/ Although i love yellow… at first glance, it reminds me of the buggy made by seckta kites, that i unfortunatly had the displeasure of trying to ride. Upon closer look, i can tell that it aint a seckta buggy. it looks awesome dude, good luck, happy riding.
88/ nice buggy will be smooth
89/ Looks good Carl will have to try it out if you’re at mable any time
90/ That looks pretty good. I can see lots of influences in there.
91/ Whats the frame weight?
92/ Looks cool buddy, when you making mine? powder coated in yellow please
93/ Looks very nice; one of the nicest ‘homebuilts’ have seen on here. Like Andy said can make out Parastorm stylee forks and PL susp style axle.
94/ Is it made of stainless or mild steel? Any idea of the weight?
95/ Let us know how it goes when you test it…
96/ thats got to be the best home bluid yet ,but its got me thinking will it squat on full power??? dont go yello ive patent to my buggy
Looking Killer .how Much Time And Money Did You Spent ?i’ll Give You 9.5 On 10.what Is Weight,it Is Steel Right?
97/ Well done m8 as some of the above have said thats one of the nicest home builds i’ve seen (and i’ve built a few).Hope it runs as well as it looks.
98/ fantastic looking buggy – do i guess right that fabrication is your thing?
99/ well cool -let us know how it goes
100/ Nice job & looks very well proportioned. The buggy looks like it would ride our dunes here very well & has good clearance to reduce the effects of grounding on the crests & other sand undulations. Would need bigfoots though (detail).
One thing that I don’t understand & have seen with production buggies is on the fork. The bridges are not straight but angled. Is there a specific reason you made it that way? (Improved stability at high speed perhaps?)
The rake angle looks about perfect & what I like to see on a buggy. You obviously thought hard about folding the buggy & the feauture you built in does the job. I like the plates on the footrests. Looks very comfy.
I note you are using a Libre seat. Did you have any problems buying just the seat from Libre? I did and finished up buying one from Eliot (also a very good quality seat like Libre & slightly cheaper).
Is there a reason you made a very squarish frame i.e. the sharp angled side rails at the front? Did you have a restriction or problem of tube bending?
PL type rear suspension. I like this as it is simple & can be made quite robust without adding too much weight like on parallelogram type suspensions.
What size axle bolts did you fit?
I have a couple of minor concerns on the structural integrity:
1) On the rear suspension swinging arm you have drilled small holes in the arms close to the pivot holes. Was this to save weight or purely cosmetic?
2) On the side rail connection to the rear axle. I note that the plate is sort of half round but not tool long. On similar designs here we have seen cracking of the rear axle tube next to the welded plate. If you look on the Libre buggy, they make this plate quite long to spread the load through the weld over larger area. I built a buggy here without that feature & suffered cracks. I have eliminated as far as possible welds on my latest buggy prefering to bolt where practically possible.
After the powder coating & fitting of mudguard, I guess you still have to put on some side rail & rear roll bar padding. I hope you post some more pics when this final detail is added.
I know how much work goes into making a buggy and glad you have something to be proud of. You will have to let us know how the test rides work out. Don’t be ashamed to tell us if something breaks or there is something you don’t like after using it a while because guys like me can learn from your experiences.
Finally, congrats on a good job.
Sand-Yeti
101/ looks sweet to me…
102/ Pad up the siderails and backrest – custom sized covers for pipe lagging at www.buggybags.co.uk
103/ And DROP that seat dude….Lower it down and feel the speed.. Lower Centre or gravity so that at total suspension travel your bum is 2″ from the ground…. ish..
104/ Looks very cool
105/ That is an awsome effort and something to be damn proud of.
106/ Excellent work there mate.
Regards,
.Joel
107/ top job man ….
108/ awesome looking buggy!!
109/ any chance we could see some pictures it folded?
110/ Nice work there popeye, very proffesional job you have done there.
111/ I think you should change your name to popeyethewelder/fabricator
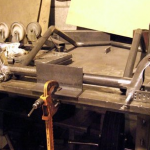
112/ That looks like your place of work in the pics. I can’t even make a groundpeg without being spotted how the hell did you get away with a homer that size??
113/ That looks the business. Very well done. Hope you are as proud as you look in the photo.
114/ Nice fab shop too……theres a worrying lack of pr0n on the walls though
115/ top buggy build like to see it in action at speed with the shock lay out
116/ Looks fantastic ……….when can i have a go…????
117/ Sweet buggy just shows what you can do with time and a welding shop.
118/ Good Job.
119/ One thing you will find happening with that style of suspension is the pull of the kite will tend to make the buggy roll towards the kite ie squat down on one side. Not to much of a problem here as you have nice high siderails to keep you in. The old PL version was terible, but yours looks built to last. We made our PowerSpring suspension to solve this and then went for double wishbones on the vflex2. How much trail and rake have you gone for on the front end? hard to measure off the photo. Sand-Yeti the “angled fork bridges” move the wheel forward ahead of the steering bolt, this is instead of a bracket at the end of the fork leg where the axle goes through. (thus giving you trail) I’ll have to re-read the axle bolt problem, but it seems you had a lot of fun and games there!! Top tip for you – put the foam on, then wrap with cling film, then put your siderail covers on.
120/ very nice buggy whish I could spend my spare time at work doing somthing like that.
121/ One thought about the construction if you have used elbows for the bends will this not run the risk of the tubes cracking where the tube goes into the elbows, where as if it was a continues tube the load would be spread out? this is not a criticism but a question from a mere mortal.
Andy m
122/ Awesome buggy dude don’t know a great deal about the makeup of buggies but i know what looks good. Just a small detail with the shocks, having owned a number of mountain bikes, might be worth getting some neoprene covers to keep the sand and salt water out, that is of course if you’re gonna use it on a beach.
123/ For a freestyle buggy it is not light.
124/ For a race buggy, that is lightish..if that makes sense.
125/ As my mate would say two words “Bling Bling”
126/ Stunning!! Got some excellent skills there mate.